Here's how you can make Halloween-themed slime in your own home (and the science behind it). It's the perfect activity for some indoor Halloween fun!
 Materials
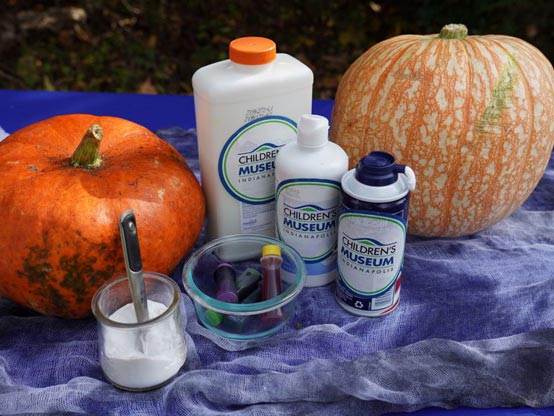
- White glue
- Baking soda
- Shaving cream
- Contact solution
- Food coloring
- Large bowl
- Measuring spoons
- Big spoon for stirring
Process
- Add approx. 3 cups shaving cream to large bowl.
- Add ½ cup white glue.
- Add food coloring.
- Stir.
- Add ½ teaspoon baking soda. Continue to stir.
- Stir in 1 ½ Tablespoons contact solution.
- Stir until it reaches desired consistency. The more you knead your slime, the less sticky it will get.
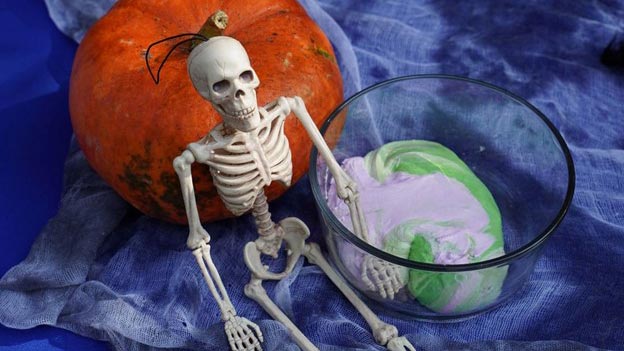
Results
Here’s the main thing: all slimes—no matter what recipe you’re using—are made up of a chemical structure called a polymer. We can break down “polymer” into its root words, both from Ancient Greek, to figure out what it means. “Poly” means “many” and “mer” (from “meros”) means part, so a polymer is a molecule (a chemical combination of multiple different atoms) made of many smaller parts all linked together. Polymers are typically stretchy, or at the very least can be molded easily when they’re heated, and then set into a stable shape when they cool down. Rubber, plastic, elastic, and PVC are all common examples of polymers. Heck, even your DNA is technically a type of polymer.
Glue, on its own, is not a polymer, but it has the potential to be one. It’s a solution of monomers. “Mono” means “single,” so “monomer” means “single part.” If you can find a way to combine those single parts, you can turn them into a polymer. That’s what the baking soda/contact lens solution and the liquid laundry starch do. They are called crosslinkers. A crosslinker has the power to combine those monomers into polymers. This is a form of chemical change: you start with one set of molecules (our glue monomers) and end with a different set (our slime polymer). What we finish with is chemically different from what we started with.
Slmes work on that same basic principle of crosslinking monomers into polymers. When we add different ingredients, we add different qualities to our slime, but the chemistry is the same. The shaving cream that we added to fluffy slime hangs out in the mixture and does what foam does: holds on to tiny little air bubbles, which is what gives that slime its extra size and its soft, fluffy texture.
Now that you understand the basics of slime making and crosslinking, you can experiment with the ingredients we’ve used here, and maybe even try others. You always need your glue and your favorite cross-linker, but what else can you do? Can you make glowing foamy slime? What happens when you mix in something weird, like sand? Can you use it to build a slimy haunted sand castle? The possibilities are endless, and it just takes some creativity and a little bit of time.
Remember—no matter what kind of slime you make, always clean up after yourself, and always put your slime away in an airtight container in the fridge when you’re done playing. Homemade slime doesn’t last as long as natural polymers like rubber or manufactured polymers like plastic, and, like food, it’ll stay fresh longer if it’s sealed up and kept cold.
But even though we’re storing it in the refrigerator, you’re still not allowed to eat it. Cool? Cool.
Buy Haunted House Tickets
Buy tickets to the nation's longest running continually-operated haunted house. You'll have a a fa-boo-lous time.


