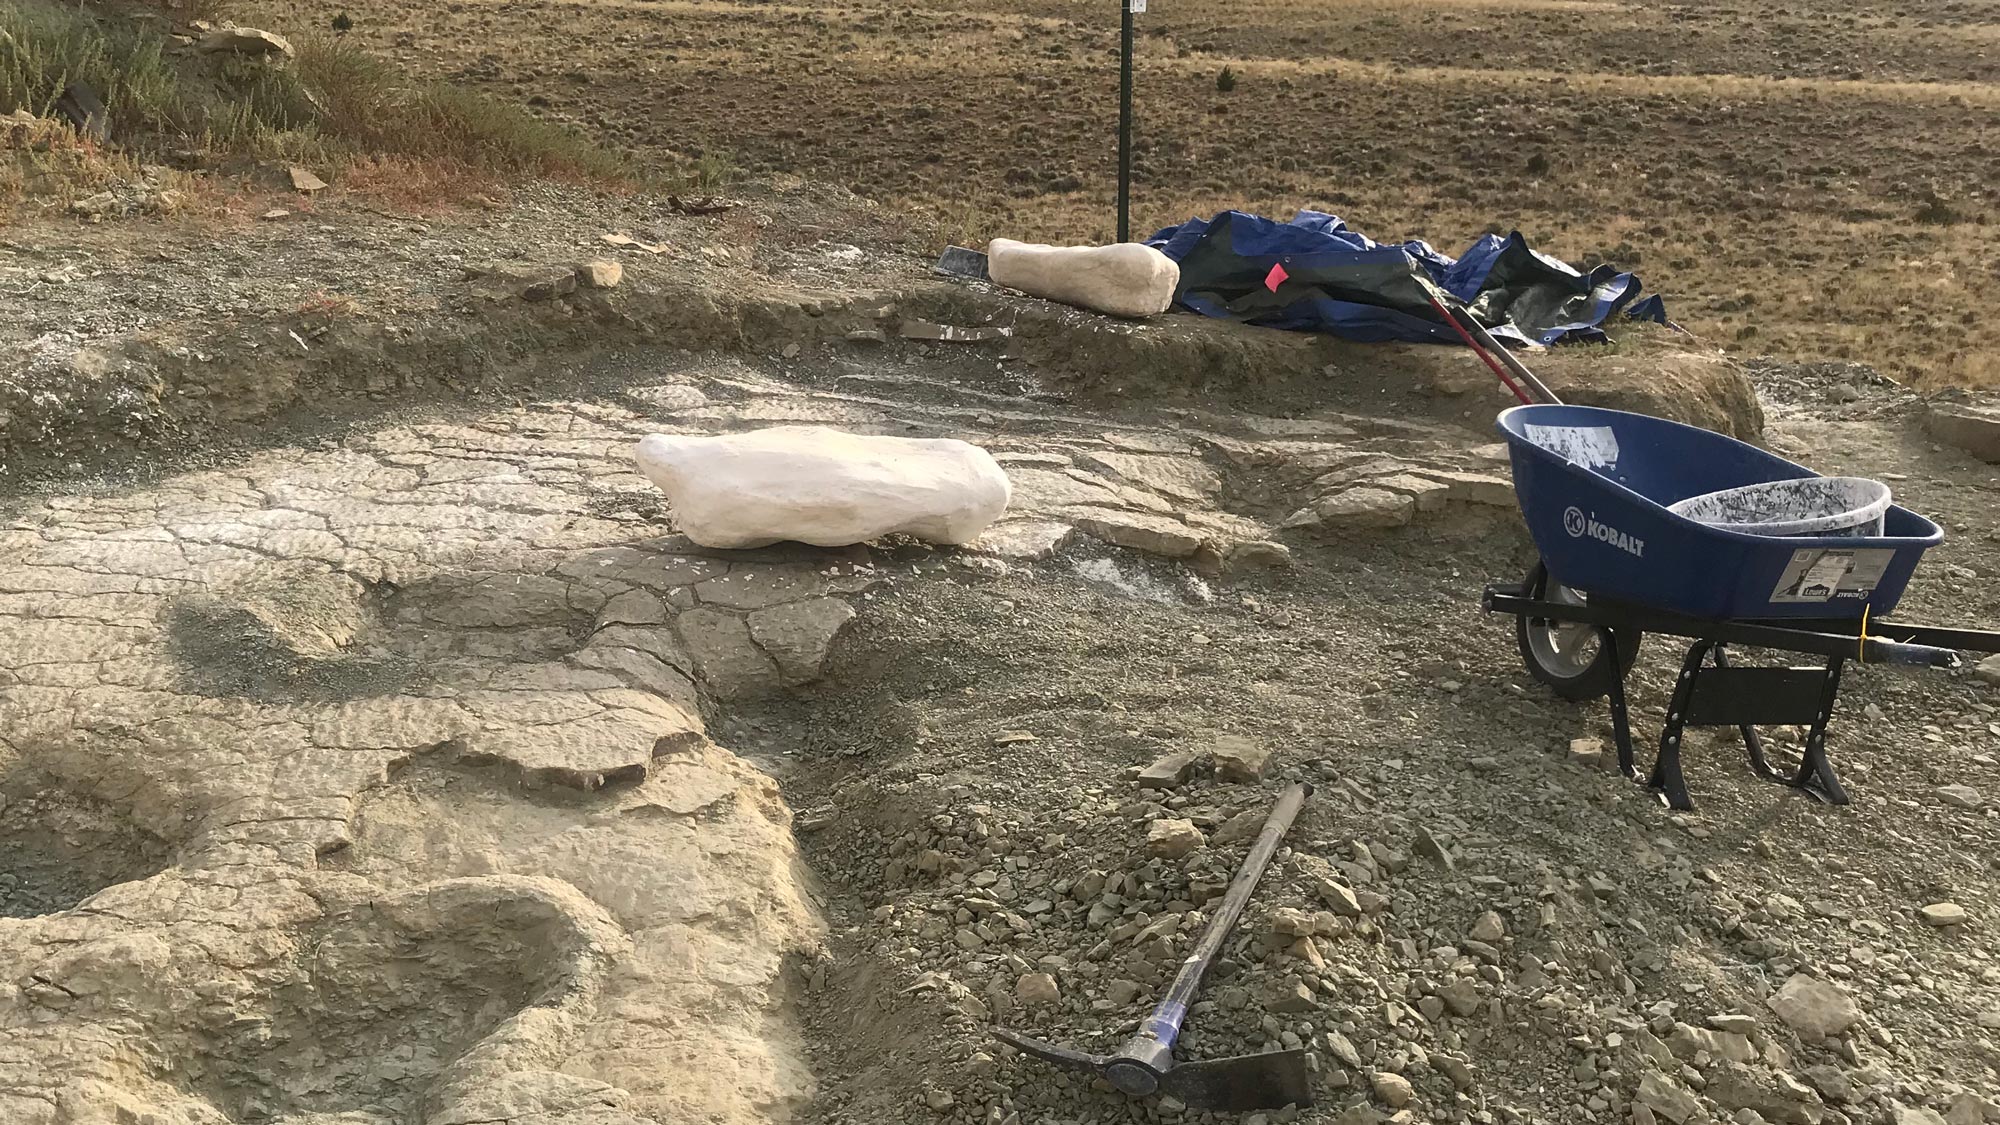
Each year, our team of paleontologists heads out to Jurassic Mile® dig site in Wyoming where they embark on a mission to dig up and recover dinosaur fossils. This can be a complex process, with many steps that go into making sure the fossils get back to the museum safely.
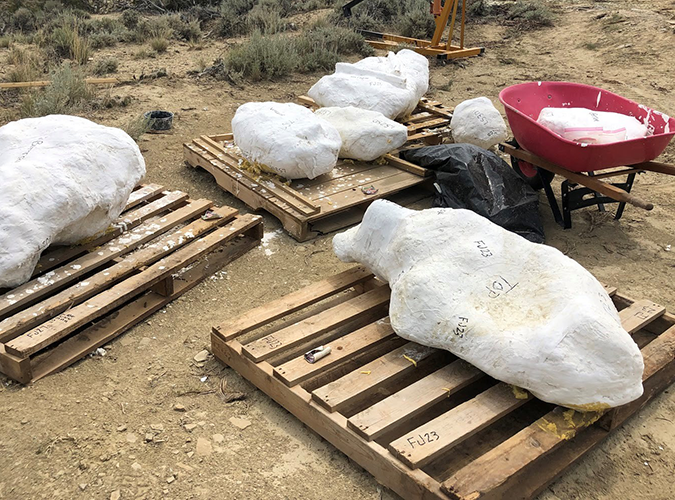
One of the major steps in this process that you might not know about is field jacketing. If you look at these pictures, you’ll notice a bunch of white objects scattered around. These are field jackets, which is an important part of ensuring that the fossils are protected against the weather and kept safe during transport. This way, they can make it back to the museum in one piece to then be worked on in the lab!
So, what exactly is the process surrounding field jackets?
First, they dig around the bones to determine where the outsides of the bones are. This helps them decide whether the bone can be taken out by itself, or if several bones need to be put in a larger field jacket together.
They then begin digging a trench around the bone.
A field consolidant—a special type of adhesive that is easy to remove—is added to the fossils to stabilize the bones.
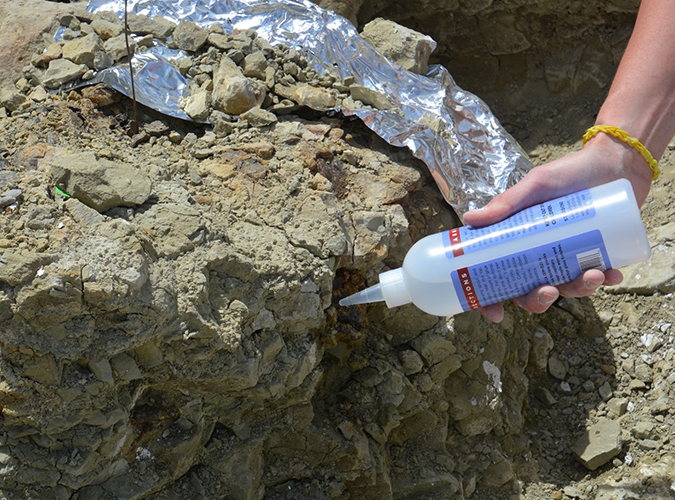
The area is covered with a cushioning material. For larger field jackets, they typically use plaster, burlap, or aluminum foil. For smaller, more delicate fossils, they might use paper towels.
Aluminum foil is placed over the cushioning material. This acts as a barrier between the bones and the wet plaster.
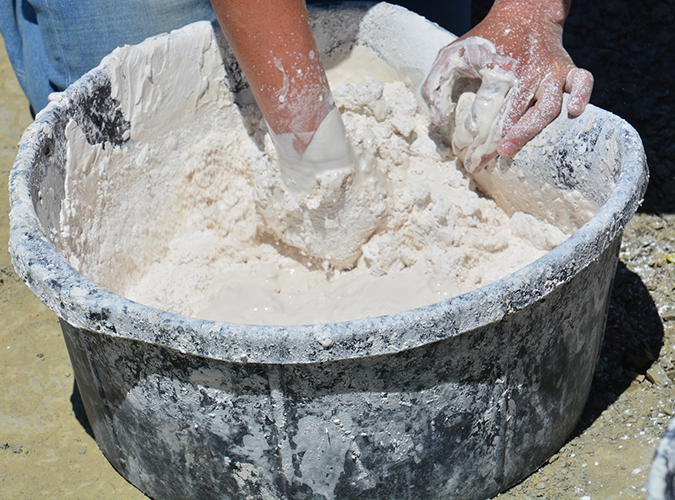
Strips of burlap are cut to the size needed for the jacket.
The plaster of paris is mixed and the burlap strips are soaked in the mixture. They ensure that it soaks into each hole of the burlap material for the best covering results.
The plastered burlap strips are then placed onto the aluminum foil. The strips are contoured as tightly as possible to make sure the bones are secured in place.
The plastering process is repeated all over until it covers the entire fossil area. The plaster is smoothed out to ensure there are no sharp edges or holes.
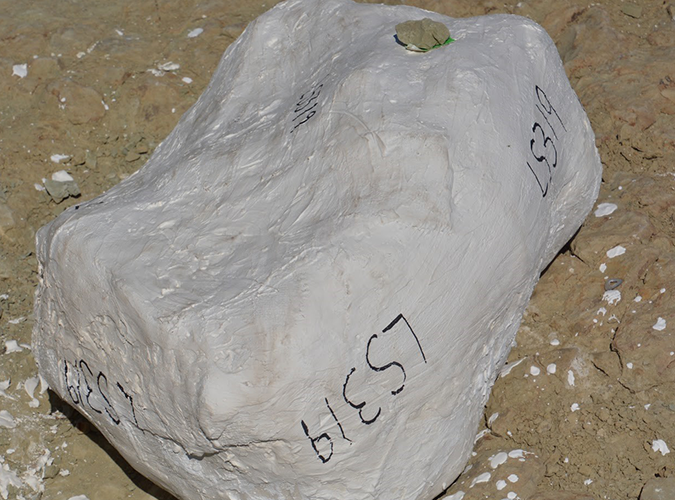
It is left to dry for 8 to 12 hours. The hotter the temperature, the faster the plaster will harden!
After it is dried, they write the designated field number on the jacket. This number identifies what is in the jacket.
Finally, they continue to trench and tunnel under the jacket and plaster the edges until it forms a sort of mushroom shape. This allows the jacket to then be removed without anything falling out of the bottom.
Once this process is complete, there are a few different things that can happen. Some are sent to The Children's Museum to be prepped, while others are left on-site to be excavated during the next digging season. The ones left there are buried in dirt to protect them from the cold winter weather.
After the fossils arrive at the museum, the cleaning and prepping process begins. You can watch this process when you visit the paleontology labs in Dinosphere®!
Mission Jurassic is a $27.5-million project that will be brought to life through the generosity of donors like you. For extraordinary naming opportunities check out our Mission Jurassic Field Guide or contact Amy Kwas at 317-334-4608 or AKwas@childrensmuseum.org.
Donate Now


